Splitters in Dynamics AX [X++, SysFormSplitter_Y, SysFormSplitter_YBottomBound]
There are 3 types of splitters : X -axis, Y-axis and Y-axis BottomBound
Classes which help for adding splitters are listed below.
1.SysFormSplitter_X
2.SysFormSplitter_Y
3.SysFormSplitter_YBottomBound
Splitter is actually a group control but by setting up some properties on the group control will make it look like a thin line as a seperator.
Let us learn all these splitters one by one with an example.. Follow me to learn splitters..
Y_Axis splitter:
Create a new form with name SR_YAxisSplitter and add 3 new controls to it.
Add a stringEdit control “Name” and set the autodeclaration property as “Yes”
Add a group control “GroupSplitter” and set the proeprties as shown in the image below.


Add another string edit control “Organization” .
Now, your form should like the screen shot below

Modify the classdeclaration method of the form by creating an object of SysFormSplitter_Y as shown below
public class FormRun extends ObjectRun
{
SysFormSplitter_Y _formSplitter;
}
Override the init() method of the form and instantiate the SysFormSplitter_Y class as shown below.
void init()
{
super();
_formSplitter = new SysFormSplitter_Y(groupSplitter,Name,element);
}
Override 3 methods mouseup(), mousedown() and mousemove() methods as shown below

______________________________________________________________________
int mouseUp(int x, int y, int button, boolean ctrl, boolean shift)
{
int ret;
ret = super(x, y, button, ctrl, shift);
Return _formSplitter.mouseUp(x, y, button, ctrl, shift);
}
_______________________________________________________________________
int mouseMove(int x, int y, int button, boolean ctrl, boolean shift)
{
int ret;
ret = super(x, y, button, ctrl, shift);
Return _formSplitter.mouseMove(x,y,button,ctrl,shift);
}
_______________________________________________________________________
int mouseDown(int x, int y, int button, boolean ctrl, boolean shift)
{
int ret;
ret = super(x, y, button, ctrl, shift);
Return _formSplitter.mouseDown(x, y, button, ctrl, shift);
}
_______________________________________________________________________
There you go.. We are done with the development. Now let’s see how your form look like with your newly created splitter. Below is the screen shot.

____________________________________________________________________________________________________________________________________________________________________________________________________________________________________________________________________________________________
X_Axis splitter:
Let us learn now how to create X -Axis splitters on the form
Create a new form by name SR_XAxisSplitter as shown below.
Add first group control and set the following properties as shown below
Height : ColumnHeight
Widht : ColumnWidth
Columns: 3
FrameType : None
Below is the screen shot for your reference : Columns property – set to 3

Inside the group add 3 controls
1) StringEdit control “Name” [Autodeclaration property - Yes]
2)GroupSpliiter Control
3)ListView control with properties [Height - ColumnHeight and width as ColumnWidth]
Set the following properties on the GroupSplitter control


Next, paste the following code in the classdeclaration method
public class FormRun extends ObjectRun
{
SysFormSplitter_X _formSplitter;
}
Override the init() method and add the below code
void init()
{
super();
_formSplitter = new SysFormSplitter_X(groupSplitter,Name);
}
Override mouseup, mousemove and mousedown method on the groupsplitter control and add the below code
______________________________________________________________________
int mouseUp(int x, int y, int button, boolean ctrl, boolean shift)
{
int ret;
ret = super(x, y, button, ctrl, shift);
Return _formSplitter.mouseUp(x, y, button, ctrl, shift);
}
______________________________________________________________________
int mouseMove(int x, int y, int button, boolean ctrl, boolean shift)
{
int ret;
ret = super(x, y, button, ctrl, shift);
Return _formSplitter.mouseMove(x,y,button,ctrl,shift);
}
______________________________________________________________________
int mouseDown(int x, int y, int button, boolean ctrl, boolean shift)
{
int ret;
ret = super(x, y, button, ctrl, shift);
Return _formSplitter.mouseDown(x, y, button, ctrl, shift);
}
______________________________________________________________________
That’s it..we are done with X-Axis splitter as well. Now let’s see how the form looks like. Below is the screen shot

____________________________________________________________________________________________________________________________________________________________________________________________________________________________________________________________________________________________
Y_Axis BottomBound:
Y-Axis button bound will be used in ListPages forms as a splitter between the grids and any other controls
Below the screenshot – of newly created ListPage. Follow the properties and addition of controls as shown below.

Next, paste the below code in class declaration method
public class FormRun extends ObjectRun
{
SysFormSplitter_YBottomBound splitter;
}
Override the init() method and paste the following code
public void init()
{
#define.startupHeight(175);
super();
splitter = new SysFormSplitter_YBottomBound(grid, ctrlSplitVertical, previewPane, this, #startupHeight);
}
Override the mouseup, mousemove, mousedown methods on the groupsplitter control and paste the below code
int mouseUp(int x, int y, int button, boolean ctrl, boolean shift)
{
int ret;
;
super(x, y, button, ctrl, shift);
ret = splitter.mouseUp(x, y, button, ctrl, shift);
return ret;
}
______________________________________________________________________
int mouseMove(int x, int y, int button, boolean ctrl, boolean shift)
{
int ret;
;
super(x, y, button, ctrl, shift);
ret = splitter.mouseMove(x, y, button, ctrl, shift);
return ret;
}
_____________________________________________________________________
int mouseDown(int x, int y, int button, boolean ctrl, boolean shift)
{
int ret;
;
super(x, y, button, ctrl, shift);
ret = splitter.mouseDown(x, y, button, ctrl, shift);
return ret;
}
______________________________________________________________________
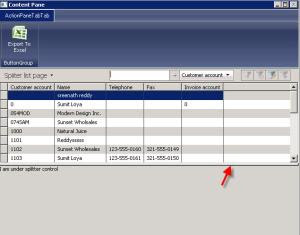
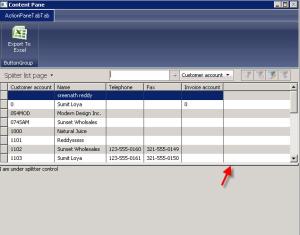
That’s it pals..we are done with the splitter on the list pages. Below is how your listpage look now.